
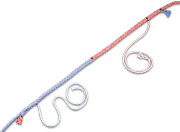
Kenbraid Splicing with Core
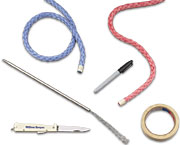
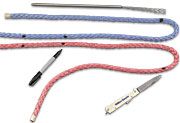
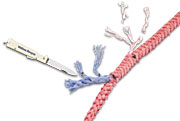
[separator style_type=”none” top_margin=”5″ bottom_margin=”5″] Step 1 Ready to splice – carrier rope ends, Kenbest® Fid, William Kenyon® safety knife, tape, and marker.
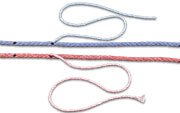
[separator style_type=”single” top_margin=”20″ bottom_margin=”20″] Step 2 Mark both ends at approximately 20″, 36″ and 44″ from the ends.
[separator style_type=”single” top_margin=”20″ bottom_margin=”20″] Step 3 Pull the core out at the 36″ mark being careful to pull it out between the plaits of the braid. Tape the ends.
[separator style_type=”single” top_margin=”20″ bottom_margin=”20″] Step 4 (A) Place one end of the rope cover into the fid basket. Insert the fid point at the 20″ mark of the opposite end, between the plaits. (B) Guide the fid through the rope and exit at the 44″ mark, keep the rope loose so as not to catch or penetrate the core between the 36″ and 44″ area. Pull the cover through until the 20″ mark lines up.

[separator style_type=”single” top_margin=”20″ bottom_margin=”20″] Step 5 Insert the remaining rope cover in the fid. To “lock” the splice pass the fid completely through the opposite cover at the 20″ mark. Re-enter the cover one plait down and repeat step 4 (B).

[separator style_type=”single” top_margin=”20″ bottom_margin=”20″] Step 6 Pull the cover through until the 20″ marks come together, give a firm pull on the ends to insure the center is tight.
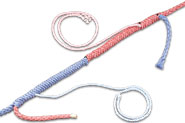
[separator style_type=”single” top_margin=”20″ bottom_margin=”20″] Step 7 Working from the center out slide the cover over the inner rope eliminating the loose areas. Mark all four ends where they exit the rope, pull the ends out 5″ to 6″ and cut at the marks just made.
[separator style_type=”single” top_margin=”20″ bottom_margin=”20″] Step 8 The overlap area must be tapered to maintain a constant diameter. To taper the cover lift one plait 4″ from the end, cut and remove. Repeat this at 3″ and 2″ from the end. Taper the core in the same manner. Repeat the process on the cover and core at the opposite end.
[separator style_type=”single” top_margin=”20″ bottom_margin=”20″] Step 9 Work the rope gently from the center of the splice out in both directions until the rope is retracted inside the cover. Repeat the process towards the splice until the core is retracted completely.
![]()
[button link=”https://williamkenyon.com/wp-content/uploads/2014/08/Splicing_with_core.pdf” color=”default” shape=”round” target=”_blank”]Download Brochure[/button]